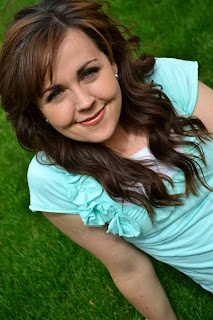
Original
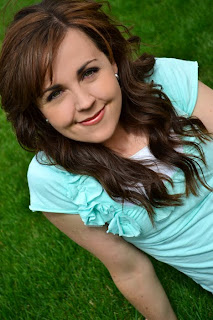
Enhancement-Perfect Model; 5/19/2011, 4:06 pm; Rexburg, Idaho; f/5.6; 1/800 sec; Nikon D3100
On Joelle's portrait I increased saturation and blacks in Camera Raw first. Then in Photoshop, I copied the background to do my editing. I brightened up her eyes using the paintbrush tool, in the color dodge and lighten modes. I also used the paintbrush tool on her skin, on a 30% opacity and flow, selecting different pixels as I went. I used the spot healing brush on just a few places. To blend her hair at the roots I used the paintbrush tool-both color dodge and overlay modes.
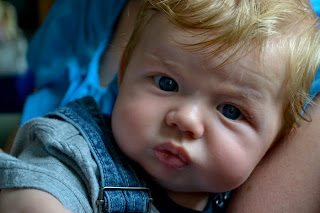
Original
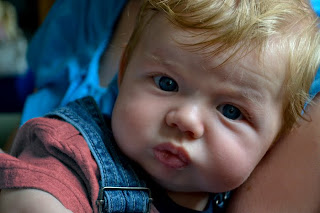
Color Replace-Chubby Cheeks; 5/21/2011, 2:32 pm; Rexburg, Idaho; f/5.6; 1/100 sec; Nikon D3100
To replace the color of the shirt, I first made a selection using the quick select tool. Then I went to Image-Adjustments-Replace Color. I increased "fuzziness", selected the pixels in his shirt with the eyedropper tool, then moved the 'hue' to red. I increased the saturation and darkened the color a bit.

Original; 5/18/2011, 8:12 pm; Rexburg, Idaho-BYUI Center; f/1.6; 1/60 sec; Canon Rebel T2i

Color Match; 5/18/2011, 8:14 pm; Rexburg, Idaho-BYUI Center; f/1.6; 1/1000 sec; Canon Rebel T2i
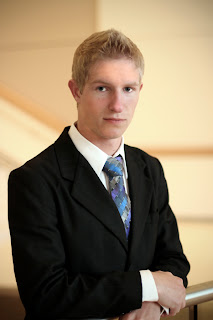
Color Match After- It was difficult for me to find a couple of photos that this would work on. This was the only one that had a lighting problem. So to catch the color, I opened both images, and selected the one with the lighting problem. I went to Image-Adjustments- Match color. I selected the other image as the Destination Image. I realize these aren't the best images, but I did not correct them in Camera Raw so that the color match effect would work. I did smooth his skin using the paint brush on 30% opacity and flow, and also brightened his eyes in color dodge and burn.
No comments:
Post a Comment